Tuesday, January 20, 2015

Mixed media, take 1!

So, in starting this new Documented Faith project, I have discovered the wonderful world of art journaling! It is beautiful! Basically, it is creating art!  It can be painting, mixed media, coloring or all of the above!  I went crazy pinning away on my new Pinterest art journaling board.  I found a YouTube tutorial about a mixed media piece and wanted to try it out.    I loosely based this project on the video that I watched.

Today, I went to Michaels and I bought this watercolor pad (used 40% off coupon!), gesso (on clearance for $3.99!), a foam paint brush, a few $0.15 stamps (90% off!) and a white Gelly Roll pen.  My sweet sister gave me some money for Christmas, so of course, that meant new  craft supplies! YAY ME!!! Thanks, Laura!!! Love you!

I started off with some dictionary pages, from the one I bought at the 99 Cent Only Store.  I left a few whole and then ripped some and glue sticked them down on the page.

I put some glitter washi tape down. I didn't really like this washi tape, because it didn't stick very well.  This was all I had left of it, so I figured it would work great to use for texture!

I covered the entire page in gesso.  Gesso is used as a base for painting. 

Gesso covered page

Love my spray mists!

I sprayed some spray inks on the page.  I tried to blot it with a napkin and that's how the dark smudge at the top happened.   But hey, it's my first time trying this out, so I'm learning through the process! ;)

I took the caps off the bottles and dripped some colors directly on the page!   It was looking dull and dark, so this helped give it a pop of color! 

I used a spaghetti sauce lid, a water bottle lid and a juice bottle lid dipped in paint to make the circles. 

I then stamped some of my new stamps in different colors on the page.  The key is done in white, silver and purple.  The crown is done in black.

Hope and faith are my two words for this year! I put some sticker letters down and painted around them. 

I like how the painting on the letters kind of look like a sunburst with the wonky edges!


I splattered some white paint on top of everything and did a few silver glitter glue dots around the page also.

For my first mixed media attempt, I am very pleased with how it turned out!!!  It was super fun trying something new and being messy!  

Now, what can I make next?!?  ;)

Wednesday, January 14, 2015

Making new backgrounds

Pinterest, Instagram, the Journaling Bible Facebook group and the Documented Faith Facebook groups are the best place to find inspirations!   I am always being inspired by someone's posts or pins!  And plus, it's fun to try new things out.

That being said, here goes something new! ;)
My daughter had a bag of rocks that she let me use.  I laid them out on a piece of card stock paper.

I then spray misted them with black, seafoam (a pretty green metallic) and silver.

I picked up the rocks and it leaves these voids in the paper.  I can used the voids to write it or do whatever I want.   Not sure what I will use it for, but we will see! 
Here is a closeup of the colors.  I think that it looks like sand or dirt almost, but super pretty! LOL!

Next, I had some sticky mesh that I put down in strips on the paper.  I sprayed this page with almost all of my colors... real cherry, teal, gold, silver, citron, and seafoam.  I like the pattern of this!

a closeup of the mesh pattern


I saw a post in one of my FB groups where someone had used an old dictionary page and had drawn or painted some pictures on the page with the text as the background.  I was really intrigued with this idea.  I bought a dictionary at the 99 Cent Only Store.  I tore out a page and placed some mesh and two of my stencils on it.  I sprayed it with a few different colors.  

I learned a cool trick from watching a tutorial on YouTube.  When you spray your stencils, there is going to be residual spray left on the stencil's surface.  You can flip the stencil over and put it down on another piece of card stock, using the ink up!  That way, your ink isn't wasted!  I actually placed the paper on top of the stencils after I sprayed the bottom sheets and then gently pressed down.   


This is how it turned out.  Looks pretty cool! The negative imprint of the stencils turned out nicely!

Here are the sheets of paper that I had done so far.


I tore out a few more pages from the dictionary and used my stencils.  My heart stencil has a lot of surface area, so the negative imprint is SO pretty! I had used purple, silver and black on that page!  LOVE!!!!!

 
Closeup of the negative impression

 A closeup of the 3 dictionary pages. You can see the shimmer of the sprays.

Here are all the sheets that I did. I had fun playing with different stencils and colors and CRAFTING!!!  I might, key word being might, paint on the dictionary pages.  I am not an artist, but have had fun trying out new things and I am so inspired by this project! 

Please stay tuned!!!!

Week 1/2 and Week 3 verse

This is the Bible verse for Week 1 and 2 of Documented Faith.  
Jeremiah 29:11, "For I know the plans I have for you, declares the Lord, plans to prosper you and not to harm you, plans to give you hope and a future!"
I kept it pretty simple. I used my Sharpie pens, some page flags (the peach and turquoise) from Target dollar bins, some stickers from Joann's, my Smash Book date stamp with Heidi Swapp black ink, and some alphabet stamps and stickers.   

For week 3, our verse was Psalm 25:4-5 NIV, "Show me your ways, Lord, teach me your paths, guide me in your truth and teach me, for you are God my Savior and my hope is in you all day long."

I was looking through Pinterest again and saw a pin that inspired me.  Now for my projects, I use a spiral notebook for what I call my scribble notebook. I write down some ideas and play with it a bit, before I decide to actually do the entry in my Bible.  

This was my first page of drawing it out and trying some different ideas.  I also like to try different fonts out to see what I like the best. I am still learning hand lettering, so usually I just use my own handwriting. 
Here is my second page, where I tried some different things out.  Sometimes it works and sometimes it doesn't, so I like to do it this way first! 

It took me quite some time to complete this entry.  I used a ruler and penciled everything in first.  Then, I went over it with my Sharpie pens and then erased my pencil marks.

 
I colored it in with my Prang colored pencils.  I think that this is absolutely beautiful, if I don't say so myself!   My favorite part is the heart with the swirls!

Adding some fun pages in my planner

For my Documented Faith planner/journal, I wanted to add something of my kids into it.  As usual, I was perusing Pinterest and saw a pin that inspired me.

I had my kids pick out a sheet of scrapbook paper that they liked.  I traced their hands onto the paper.  

I don't know about you, but I love tracing my kids' hands, so I can look back and see how much they have grown.  The other day, I found one of my daughter's hand tracings from when she was a toddler. It's hard to believe how much they have grown up! Makes me sad that time is going so fast, but makes me treasure every moment!  Ok, done with the sappy mom stuff and back to the current project. ;)

I cut out their hands and asked them to write their names in their own handwriting.  I then cut a piece of cardstock paper to fit the size of the planner page. I picked out washi tape for each of them and then proceeded to cover the page.  I had thought I was going to do it one way, then ended up doing it this way and I think it looks better!

  I also wrote their ages on their opposite hand. 

I added their nicknames to their pages and then adhered them onto my planner page.

I added their school pictures onto both of their pages.


I am so happy with how it all turned out.  My planner is getting thicker and thicker, but I LOVE this project!!! It and my journaling Bible have really brought back my creative mojo! I felt like I had lost it and didn't want to scrapbook or do anything crafty.... but now, it's back! Yay! 

Friday, January 9, 2015

A new project

At the end of 2014, my friend, Doris, told me about a project that Stephanie Ackerman was starting for 2015.  It is called Documented Faith and is based on the Documented Life Project done by Art to the 5th Academy, but is faith based.  It also goes hand in hand with Bible journaling!   Here is the link to Stephanie's blog and more information about the project. http://homegrownhospitality.typepad.com/homegrown_hospitality/do.html

I decided that I wanted to do this project!  Stephanie also created a Facebook group called Documented Faith.  I spent forever reading all the lovely posts that people had made.  They showed what they were using and how they set it up.  

Stephanie suggests using a Moleskin 12 month planner or you can use whatever you have on hand.  Since this was my first time doing this project, I wasn't sure what I wanted to use.  I could use any one of the blank journals that I had on hand or a composition notebook. 

I went to Staples to check out the Moleskin planners (they are pricey) and found this Poppin 18 month planner on clearance for $7.40!  I figured for that price, I could try it out and if I didn't like it, I could switch to one of my other options.  

I jumped right in! 

What a gorgeous hot pink color!!!!

I had read other people were using a 18 month planner, in which you could use the extra pages (months that had already passed since it started June 2014) or you could tear them out, so you would have extra room as your planner expanded! I decided to leave in the extra pages!

The planner had these stickers included in the pocket in the back.

Stephanie gives a tutorial on how to add washi tape to the pages edges and do tip-ins. Tip-ins are extra sheets of paper that are added to the side of a page and washi taped on, then folded in.  I opted not to washi tape all of my edges, and just do the tip-ins.  I wanted to add tip-ins to each month page, so I would have extra room each month, if needed.  My kids helped me pick out the washi tape for the 12 months.  We went for themes for certain months and something for each of my family's members birthday months.

Gold for January (New Year's), hearts for February (Valentine's Day), green polka dots for March (St. Patrick's Day), bunnies for April (Easter), rainbow for May (my girl's bday month), blue for June (my boy's bday month), red stars for July (4th of July), alphabet for August (back to school), mustaches for September (hubbins bday month), Happy Halloween for October (Halloween), orange chevron for November (Thanksgiving) and red snowflakes for December (Christmas).  We had fun picking them out.  

I cut a piece of card stock to size.  My daughter helped me with the next part.  We cut washi tape to size and then adhered it to the planner page... then lined up the extra sheet and stuck it on.  Then, we flipped over the page and put washi tape on the back side, just to reinforce it.
This is how a tip-in looks.  

This is what the whole planner looked like with the tip-ins all finished.

And these are all 12 months of washi taped tip-ins.
 
Next, I made monthly tabs, picking something themed again for the months.  I just punched out a square and then added washi tape to it and then wrote the month on it.  I used stickers, some scrapbook paper or even colored January's tab myself (it was a white square that I colored gold).

I folded the square in half and glued them onto the top of the month pages.  I then washi taped the edges down to hold them onto the page. 

Stephanie sent out an email with a free printable for the new year. I printed it out and colored it with Prang colored pencils! 

Each week, we are given a verse for the week.  Jeremiah 29:11 is the first verse! Since January started at the end of the week, this verse is being used for Week one and and two.  I stamped and used stickers to add it to the top of the January page.

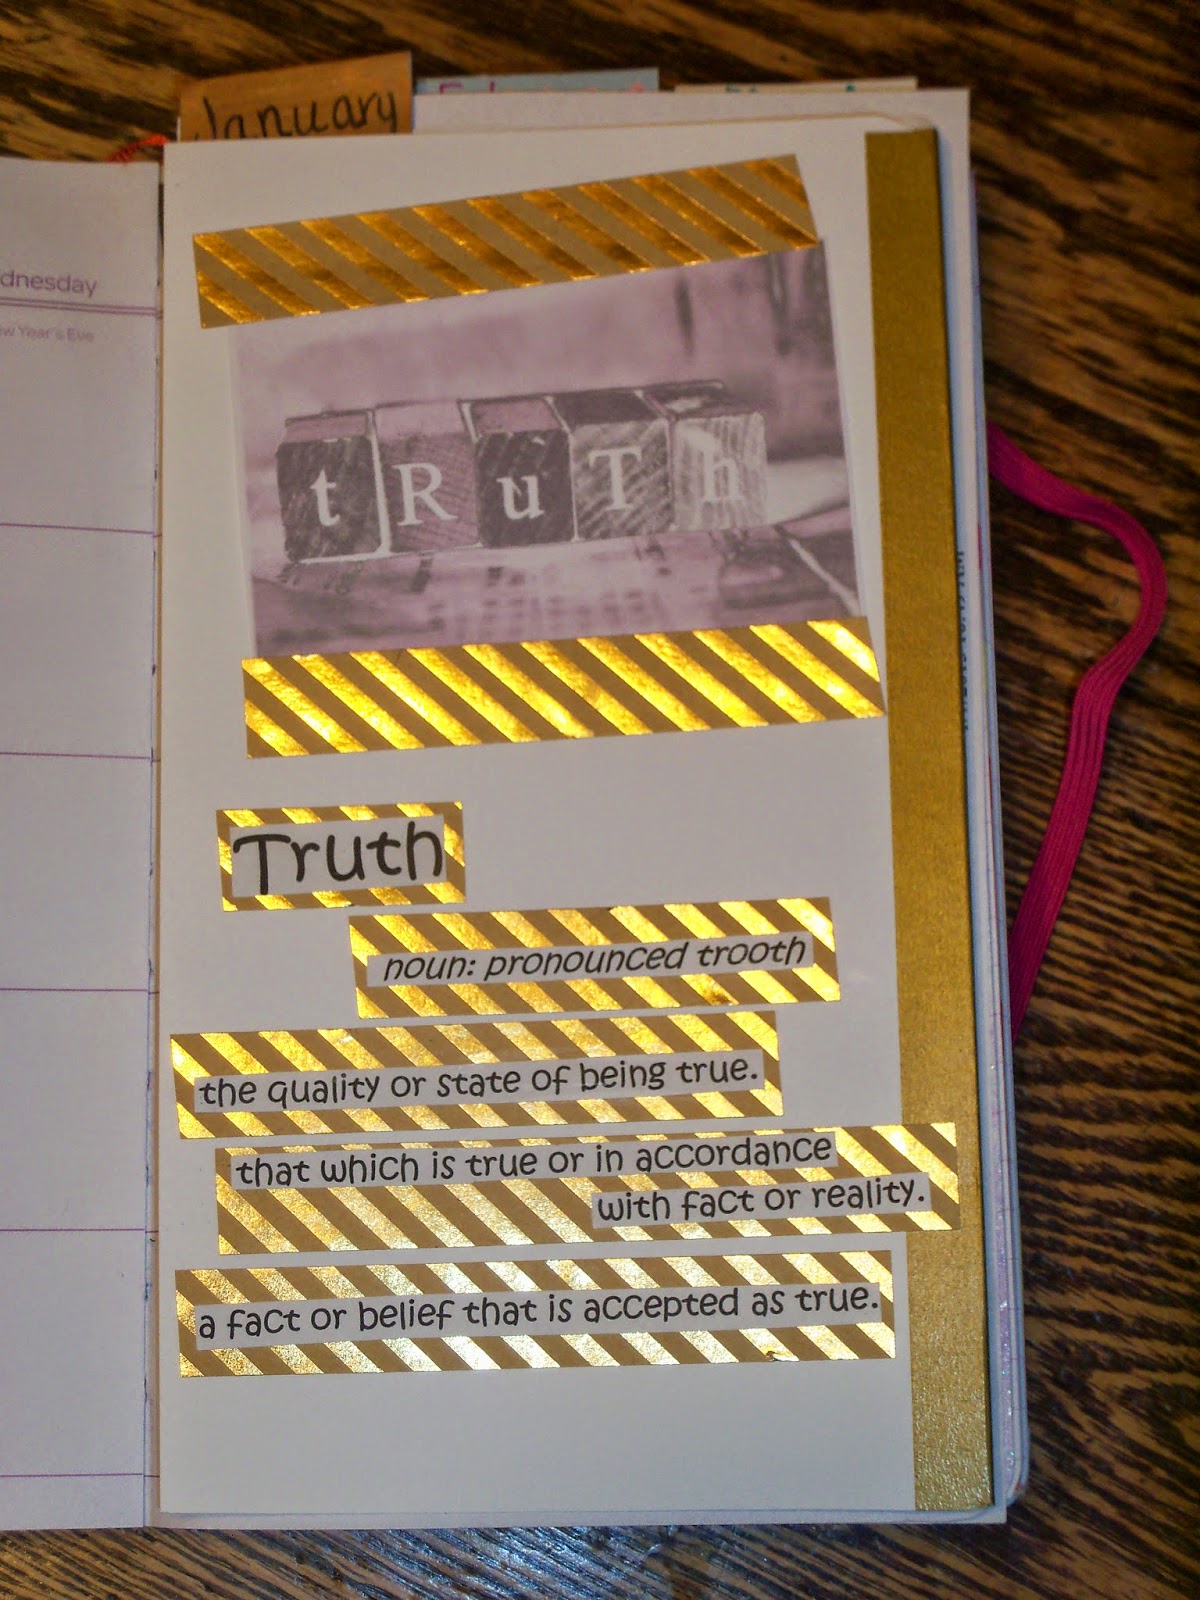
We are also given a monthly word.  This month's word is truth!  Stephanie sends an email out with the month's word and a picture.  I printed it out, but my color isn't working, but I like how it looks. I washi taped it on the page.  I looked up the definition of the word truth and printed it out. I put down some washi tape and glued the definition on top of that. I just finished this last night!

And like I said before, Jeremiah 29:11 is being used for week 2, so I did it again for this week.  I used a Tim Holtz stencil and spray misted purple, silver and turquoise on the page.  It turned out so so pretty!  I had printed out the verse and then glue sticked it onto the page!  I also did this last night! 


I used the extra pages at the beginning of the planner, before January. See, they did come in handy!  I had spray misted some other pages, cut them to size and glued them onto the planner page. I washi taped the middle part where there was a gap. 

I used the scraps from the other pages and made this page.  I washi taped the gaps... I like how it turned out.

People pick one word for the year.  Last year, I didn't really have a word, but I had a phrase that I had chosen.  It was, "Until God opens the next door for you, praise Him in the hallway!"  This year, I wholeheartedly believe is the year of change for my family! I chose two words, faith and hope.  I chose two words, because these two words go hand in hand.


I looked up the definitions of the words and wrote them out. I also looked up a Bible verse that I thought was great to go with the word.

I saw this quote in the Journaling Bible Community group and I thought it was awesome, so I wanted to add it in also!

I looked up quotes about faith and hope on Pinterest and google and added the ones that I liked!

So far, I am loving this project.  I haven't really added anything on the daily parts of the planner, except for the weather, but that's ok. 

The journey continues... stay tuned! ;)